
Video on the web is an ever-growing medium, shaping the way we learn things every day.
Not sure how to use the newest Photoshop tools? Go to YouTube. Want to learn how to improve your portfolio website? Check out a course at Lynda.
Video tutorials are an excellent way to not only learn new skills, but to share your knowledge with a worldwide audience. Unfortunately no matter how in-demand your content, a poorly-produced video tutorial will likely be abandoned within the first thirty seconds.
On the flip-side if you can put together a high quality video tutorial, you can use it to build your brand, gain quality traffic and leads, as well as share your skills. Here are eight simple tips you can use to make sure your video tutorial is everything it should be.
1. Keep it focused and to the point.
There are no set rules for how long your video should be, since every topic varies in complexity.
I will say, however, that you should strive to keep it as short as possible given the content you must present.
Too many tutorials suffer from the producer’s tendency to stretch it out in order to make it feel more substantial. Unfortunately viewers don’t have the time to sit through an overly long tutorial padded with fluff.
They want to press play and learn exactly what the title promised they would learn in as little time as possible.
Don’t use seven words when four will do, and ALWAYS remain on-topic.
2. Write a script or outline.
While it may be tempting(and easy) to just wing your tutorial, once you fire up the mic and recording software you’ll probably wish you were better prepared. Trust me, I’ve made this mistake myself and a few bad takes can really kill your confidence for the rest of the shoot.
I recommend either writing out a full script word-for word, or (if you’re quicker on your feet) an outline of steps.
A script is great if you don’t trust yourself to remember everything you want to say through the process, but the drawback is it can often sound like you’re reading. That’s not necessarily a deal-breaker for the listener, but anything that sounds stiff is more likely to be tuned out.
Personally, I like to write an outline. I plan out every step and add any points I want to make into a bulleted list. I can then look at it as I go and get the prompts I need to include everything that’s important while sounding natural and conversational.
3. Always use voiceover.
I cannot tell you how annoyed I get when I find what seems like the exact tutorial I need, only to find blaring techno music playing in place of a helpful voiceover. I attribute this to pure laziness on the part of the producer – and the result is usually a hard-to-follow mess of a video.
All good tutorials can benefit from a little voice guidance no matter how visual the subject matter. And as my dad says: “anything worth doing is worth doing right.”
4. Voice quality matters.
While we’re on the subject of voiceovers, you’ll want to make sure the quality of your voice is worth listening to.
If you’re like most people, you probably cringe at the sound of your own voice. Don’t worry – that doesn’t mean other people will. But there are several things you can do to make your voice sound its best:
- Warm up your voice with vocal exercises. Tongue twisters will help your enunciation and humming will improve your tonality.
- Watch your posture. Sitting up straight will allow you to breathe properly and give your voice more strength and clarity.
- Slow down. Speak slowly and with purpose.
- Stay hydrated. Taking regular sips of water will help your mouth from becoming dry, which can lead to annoying mouth sounds, such as smacking (you can edit out the parts where you take sips in post-production)
If you really don’t like the sound of your own voice and you have a budget to work with, you always have the option of hiring a professional voiceover artist. If you choose to go this route I would recommend recording the video with your own voice, following your script or outline, and instructing the pro to simply record an alternate track swapping out his or her voice for your own.
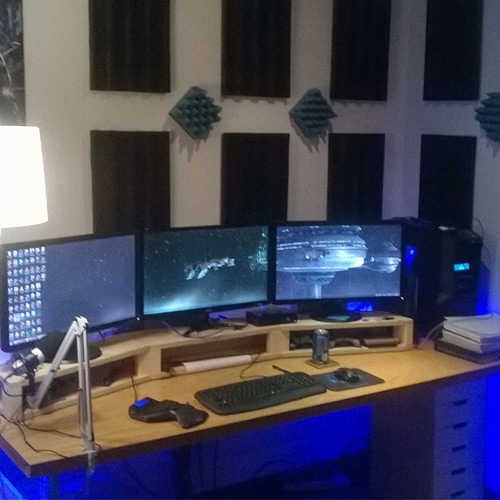
5. Audio/Visual quality matters.
Other than top-notch quality content, the best video tutorials also have primo picture and sound quality.
Make sure your video looks its best by recording in the correct aspect ratio. 16:9 is the current widescreen standard. Anything else will result in black bars along the top and bottom or left and right sides of the viewport.
Also be sure to use a screen capture software program that doesn’t impose a watermark.
As far as sound quality goes, you should make a minimal investment in a decent USB microphone. I personally use the Rode Podcaster, but it is fairly expensive at over $200. The Blue Snowball is a good choice and costs less than $50.
You could go even cheaper with a headset mic if your budget is really tight. Just avoid using your computer’s built in mic if you can, as it will definitely make your video sound amateurish.
Record in a quiet room with as many soft surfaces as possible. In general carpet is much better than a hardwood floor in terms of sound quality, as there is something there to “dampen” the sound. Close the windows and turn off the A/C to make the room dead silent.
When you’re finished you can run some audio filters over the audio to make it sound as clean as possible.
6. Move your mouse purposefully.
If your tutorial is focused on your computer screen, keep your mouse movements to an absolute minimum. Use it only to complete the necessary steps, and when you aren’t actively using it for a specific purpose, it should remain still.
A hectic, fidgety mouse will only distract and annoy your viewers. Sit on your hands if you have to.
7. Edit with a critical eye.
Once you’ve completed your video shoot, you will want to trim out the fat.
Are there parts where you were waiting for a program to fire up? Did you trip up your words and need to record do-over? Cut it out!
Most screen capture software allows you the option of a timeline based editor, so make use of it to keep the runtime down and the content rich.
8. Don’t forget the text.
Your finished video is perfect. But a well-phrased title gets people to actually click the play button.
Make sure your title is succinct and says exactly what the viewer should expect to learn. Avoid the temptation to get too cute or abstract with your title, as it could cost you valuable clicks.
You will also want to write a detailed & thoughtful description of the video. This is not only to hook potential viewers, but for the search engines as well. You want to be found by as broad an audience as possible, and if there are no written words, search engines won’t know what your video’s about.
In certain cases you might even want to write out a full text transcription, particularly if the video will live on your own website. You’ll see some SEO benefits of having everything written out in text, and it’s especially beneficial if you happen to have any hearing-impaired viewers.
Final Thoughts
Producing high quality video tutorials isn’t all that difficult if you know what the ingredients are. It’s only a bit more effort to pull off than a lesser quality video. Knowing that it will be floating around cyberspace (with your name attached to it) forever, why not make it really sparkle?


Nice overview. I have a fidgety mouse problem on some of my videos. I use the Blue Yeti mic when I’m not on screen and a Rhode mic hooked up to smartphone when on screen.