When designers first start wireframing and prototyping it often feels weird and out-of-place. I remember my first wireframing session felt like I was faking the whole thing – because in many ways I was. Yet rapidly going through ideas is the best way to achieve success in any creative field. It’s for this reason that I highly recommend designers learn how to wireframe and prototype their mockups before jumping into Photoshop.
In this guide I want to share a few wireframing tips devoted to web forms. These could be contact forms, checkout forms, signup pages, or anything that requires user input. By taking the time to wireframe your ideas they’ll come out cleaner and more apropos to the subject at hand.
Traditional or Digital?
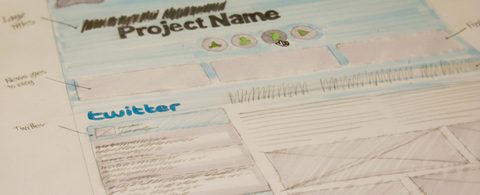
Everyone has their own personal preferences when it comes to web design & development. The process of wireframing is no different and there are two overarching methods: hand-drawn sketches or digital prototypes. Each method has a series of advantages and disadvantages so I recommend trying both to see what suits you best.
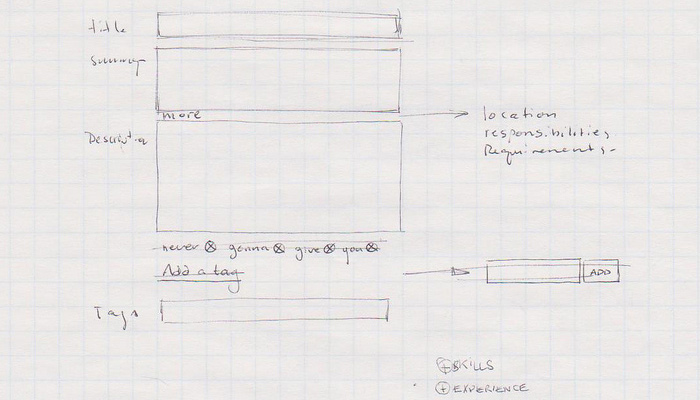
Hand-drawn wireframes offer a little more control throughout the process. With just a pencil you can draw anything, as dark or light as you wish, just using common motor skills. People who don’t consider themselves artists may veer away from this method. But in my opinion is offers a more personal connection to the design that a computer just can’t match.
Yet on the other hand, digital prototypes are much more consistent and “by-the-rules”. You can setup absolute pixel boundaries for boxes, add colors digitally, or even add prototyped fonts using a resource like Blokk font.
In the past I’ve covered similar topics on sketching wireframes and the benefit of hand-drawn interfaces. But when you’re working on a time-sensitive project speed and efficiency are more important factors. If you already know what style you like then get ‘framing! If not, I recommend testing both to see what fits you best. You may even like both techniques and try to incorporate hand-drawn styles together with digital prototypes.
Special Form Features
We all know about the most common form elements: text fields and submit buttons. The not-so-common elements are still used frequently but require a little more finesse. I’m talking about radio buttons, checkboxes, and upload fields. Each of these inputs are supported using HTML but require extra attention to detail when styling the form in CSS.
Sometimes it helps to write down a few notes about the form(s) you’re designing. Organize your thoughts from a user’s perspective based on what the user is trying to accomplish and how they’d go about doing so. It’ll help to close the gap between designer and Internet user so you’ll be able to catch common mistakes.
Wireframing and prototyping is usually not the stage where you plan out design features. But if you have some good ideas there’s no reason to ignore a particular color scheme or size relationship to each input field. Just be sure to put a focus on the interface first. This is the most important part of the wireframing stage and requires a majority of your attention.
Balance is crucial and truly defines the composition of every page element. Forms require a consistent level of balance so that users recognize the purpose of each input. Ensure that specialized input fields are seen as such, and that users can extrapolate their purpose based on the context(label text or design qualities).
Define Interactivity
This may seem like an unnecessary step but user experience is the most important part of any web form. You need every form input to be directly usable and easy to interact with. So during the wireframing phase I recommend sketching a few illustrations for how the form should behave.
Notably I recommend organizing each input field with placeholder text or label text. You might also include dynamic effects like tooltip notes whenever the input is selected. These may fly out to the right side, appear underneath the form, or appear in the label text as a hint. Based on the depth of a form you may also want to include the tabindex order.
It’s difficult to put down experiential information into the written word. Experiences are meant to be experienced, and a picture can’t do it justice. But wireframes aren’t meant to be a finished experience. They represent a game plan for you to start building the final product without hesitation. Once you start fleshing out the form into HTML/CSS you might decide to change a few of the UX concepts at the last minute.
But really try to nail down your interactivity as early as possible. Understand how and why you’re driving visitors through the form. What should be their final objective? Which elements are required and which are optional?
Wireframe to Website
Another key point about wireframing input forms is to make sure that they’re buildable. Sometimes as designers we can get carried away with fun ideas that may not be all-too-practical in the real world.
Thankfully advancements in JavaScript and CSS have allowed for an easier time building functionality. But just because more ideas are possible does not mean that every idea is useful to the overall user experience.
During the wireframing stage you should keep yourself grounded at all times. During idea generation and building the final design you want to create something that fits nicely into the layout. It should also be something that a developer can recreate with flexibility and support in almost every major browser.
My advice for generating new ideas would be to analyze what other designers have created. You might even try reverse-engineering a form on another website by turning it into a bare-bones prototype. By studying other forms you’ll learn what works, what doesn’t work, and what seems to fit best into each project.
Final Points
With enough practice you’ll get a lot more comfortable doing wireframes and prototypes for each area of a website. Forms are merely one important(yet significant) item on the list. Personally I prefer doing hand-drawn wireframes because I can get my ideas down a lot quicker. But you really need to find a process that feels comfortable and works best for you. Next time you’re designing a web form try some of these techniques and see if they add value to your natural creative workflow.







Leave a Reply