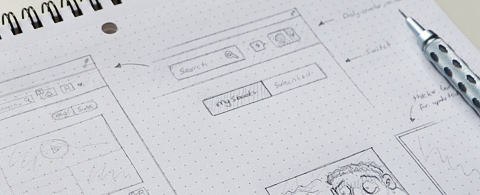
Much like other professional designers I’m a big fan of the wireframing process. Although it’s mostly associated with the field of web design, the concept of project planning is ubiquitous across all creative mediums. Logo designers sketch prototypes, animators sketch storyboards, and UI designers sketch wireframes.
In this article I want to provide a few tips to help designers get more focused on wireframing. I like to think of myself as a draftsman in the early stages. Wireframing is about structuring the interface by visually planning or mapping out the big concepts. Detailed wireframes might also includes sketches for smaller items like icons, thumbnails, and form fields.
Of course it is possible to design a creative project without any pre-planning. But I see that as a disadvantage compared to someone who took the time to measure their ideas and test their theories in a visual representation.
Practice with Existing Sites
Like many other people I learn best through actually doing something. When it comes to wireframing you probably have your own ideas on the process but may not be sure exactly how it works.
In this scenario I’d recommend a bit of practice by sketching existing website layouts. It’s a type of reverse engineering which forces you to see the bigger composition and question how you might copy each element into a low-fi wireframe. Look through Google or Dribbble for examples of detailed wireframe sketches. Keep these images handy as a reference to compare with your own quality.
Although it may seem counter-intuitive you don’t actually need to have great drawing abilities to wireframe. If you don’t typically draw a lot then your first few sketches will be messy. But that’s part of the process.
Most wireframes are messy and that’s perfectly acceptable. What matters is that you convey an accurate concept for the website layout.
The best part of wireframing by hand is that you don’t worry about pixels. A mouse and keyboard interface can feel quite jarring and perhaps stifle the organic creative process. Of course it depends how you like to create so try both methods and see what feels right.
Thumbnailing
The minimalist nature of wireframing allows you to quickly draft concepts within a 5-15 minute period. Refining details should only come after you have a great composition for the website. The exploration process to find this composition is usually called thumbnailing.
We’re all familiar with image thumbnails that are smaller versions of a larger image meant to show off a preview to viewers. Wireframe thumbnails are basically the same thing where you sketch quicker and just try to lay down various compositions. You might rearrange the column positions, column sizes, navigation design, header location, anything that’s seen in the “big picture”.
Drafting thumbnails will get you into the habit of drawing quickly. Loose and messy is fine as long as you can understand the page structure. I see thumbnailing as one of the first steps in a big project. The goal is to map out as many different concepts as possible so you have a pool of ideas to choose from. Then pick your favorite idea(s) and build them out larger with more detail.
Drawing from Ideas
While hand-drawn wireframes are beautiful you don’t always need to go this route. No matter if you choose to wireframe by hand or digitally there’s usually a feeling of chaos when starting a new project. To help trim the chaotic undergrowth around your creativity garden I’d recommend listing the most important features required for an interface.
When you have some notes or a list of words it’s much easier to use them as a reference during the wireframing stage. You’ll have a more solid grasp on how the final product should behave. If you’re working with a client be sure to get their ideas before even starting the process. Designing for yourself is much easier because you can immediately criticize what looks good and what doesn’t.
Practice drawing(or designing) wireframes from ideas. These could be notes, words, pictures, anything. This trick helps alleviate some of the confusion and gives your mind a direction to follow. And be creative with the ideas – you don’t always need to make a list of mandatory page elements. Try writing down general concepts for the user interface like a navigation structure or responsive breakpoints.
The key thing to remember is just putting down ideas. Don’t overthink too much because the wireframing stage is supposed to be messy. I’d rather put down 10 horrible ideas if they eventually lead to a great one. This process of rapid expression is a common tenet of creative work and I’ve found it to be very useful.
Handy Resources
Although digital wireframing is very pragmatic I always prefer to start my designs with paper and pencil(or pen for you daredevils). Working from a blank page offers more direct control because you choose exactly where to make the marks. Then once you’ve got a general idea it’s much easier to draft a low-fidelity mockup in digital software like Photoshop.
The following resources might prove indispensable to anyone who prefers a non-digital wireframing system. It’s simple and cheap to sketch on a ream of A4 printer paper, but this isn’t always enough once you reach a certain level of proficiency.
Sneakpeekit Digital Stencil
Behance Action Method
Gridbooks
Web Design Sketchbook
Paper Browser
If you want to improve your own wireframing abilities the best thing you could do is just get started. While this post is heavily geared towards physical wireframing there is nothing inherently wrong with using digital tools. You should stick with the method that allows you to express yourself and your ideas in the simplest manner possible. But either way I hope these tips can be of use to designers who are just getting into the wacky world of wireframing.
