
Web development is certainly a growing field with more and more people getting interested in the topic every year. Frontend development is specifically an excellent place to start, especially for designers who only have knowledge of programs like Illustrator or Photoshop. Improving your skillset beyond just design into HTML/CSS is one of the best decisions you could ever make.
But there is a little more to it than just learning how to code. At some point you’ll want to learn about more advanced topics like browser support, content nesting, and code organization.
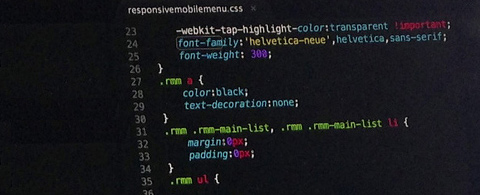
If you’re looking for suggestions on how to build a cleaner and more organized stylesheet then look no further! All frontend languages come with their own little quirks and CSS is no different. If you just hack away at a website then it’ll get done – but there may be no method to your madness. Instead it’s often more worthwhile to spend time organizing your code to make it easier and simpler to manage.
Comment Sections & Chapters
If I start coding a new project that I know is going to require a lot of work, I’ll spend time writing out brief chapter sections into CSS. These are typically organized by a table of contents using code names that are searchable. Here’s a sample comment I might use to outline a table of contents for my stylesheet:
/**
 * CH01 - Resets
 * CH02 - Typography
 * CH03 - Page Structure
 * CH04 - Header & Navigation
 * CH05 - Content & Media
 * CH06 - Footer
 * CH07 - Miscellaneous
**/
Notice that each section has its own unique numeric code in the form of CH##. You could make this literally anything you want, I chose CH for chapter because it makes sense in the context of this article. Now when adding new code you have a reference for where it should be placed to be organized with other similar blocks of code.
At the top of each section you would add another comment with the name of the chapter. Then you can do a CTRL+F search for the chapter ID to immediately jump right to that section. Chapters aren’t as useful in compressed stylesheets with all the whitespace removed, so keep this in mind if you plan on using stylesheet sections.
Consistent Spacing
The amount of space used in a stylesheet is different for each person. Different selectors will have different requirements for the number of properties. Thus it’s worthwhile to understand how you want to approach your stylesheet right from the get-go.
For example, some developers prefer to use inline code instead of block-level code. This is a little more difficult to skim but it keeps everything short. Inline code doesn’t use much space between individual properties so you could leave out spaces between the colon and the semi-colon.

On the other hand block-level properties use a stricter syntax: one property per line. Each new line is usually indented by a tab or a couple spaces. This formatting behaves almost like an indented paragraph to help you recognize the differences between selectors and properties.
Almost every project uses a mix of big and small property lists. Thus I’d recommend finding a balance between inline and block-level syntax. Use the block styles for any selector with 5 or more properties. Then anything with 4 or less properties can be simplified onto one line.
Naming Conventions
The class and ID names used in each project may seem arbitrary, but they are indeed an important topic of discussion. How you name items in your work should be relative to the project itself. If you name classes using underscores mixed with dashes there had better be a good reason!
Also it’s crucial to have a game plan when organizing your layout structure. Are you using floated elements that require a clearfix? Will you be using standard HTML5 elements or something more common like divs? There is no right or wrong answer, but the answer does heavily impact the structure of your CSS.
Naming schemes often derive from personal choice. This can be good since each name will make sense to you, but it might be confusing if you’re working in a team environment. Strive to build a system where class & ID names are relatively straightforward and easy to understand. Unfortunately the best way to do this is through practice and repetition – but you can learn a lot by studying the source of other well-constructed websites.
Expanded or Minified Code
This is a quandary that many developers are faced with, especially when it comes to WordPress theme development. Is it more worthwhile to keep a CSS file expanded with lots of space between each property, or to compress the whole thing by removing all whitespace?
Obviously the expanded version is a whole lot easier to edit. You can see every selector and every property quite clearly. The file size may be slightly larger but editability is in-tact. Most of the time I keep an expanded stylesheet because I’m frequently editing the file and making little tweaks here-and-there.
Yet on the other hand you have the minified, compressed CSS file with absolutely no whitespace. This almost looks like a block of JavaScript collapsed into a big unreadable mess. If you know how to CTRL+F search for the exact bit of code then it might be a little easier to edit – but it’s still not the easiest thing to read.
So what’s the best method to choose when structuring your own stylesheet? I think it completely depends on the size difference and purpose of the website. For example if you’re launching a new blog that will be updated frequently, it’ll be easier to just keep the regular stylesheet syntax. WordPress themes take information directly from the stylesheet and it’s much easier to edit styles from WP if you can read them at a glance.
I feel the best reason to compress a stylesheet is when you have thousands of lines that really add bulk into the filesize. Lots of free tools like Minify CSS or Clean CSS exist online which help you automate the compression. Some developers prefer to use the compressed version live on the site while holding onto a regular expanded version for future customization.

I’d say it’s a balancing act to determine the objective value for either side. How much bandwidth can you save during each request by minifying and caching the stylesheet? Is it worth sacrificing readability and the ease of remote editing? These are questions you’ll have to ask & answer for yourself on each project.
Splitting Files
One last procedure that I want to share is a split between different stylesheet variations. For example you might want to create a general style.css which holds all the basic information of the page layout and hierarchy. This single file could include everything in the project split up into comment sections like I mentioned earlier.
But what if you need 900 lines of code just to build the typography styles? This might warrant a new stylesheet named typography.css which could then be included into the site separately. Although it is one more HTTP request, it might help to keep your site a little more organized.
But let’s say you wanted to try something a little different by splitting stylesheets based on page styles. For example, if you have a video player interface you might create a separate stylesheet just for those video pages. In that scenario the video player CSS only needs to be included on the video player page. In fact, adding those codes into your main stylesheet adds unnecessary weight onto the pages which don’t have a video player.
In many aspects this can be an excellent method for organization but it’s not always the best idea. I think multiple stylesheets are most useful when there are humongous blocks of code that really ought to be segregated.
Another important reason for separate files might be handling different browsers with conditionals. HTML has something known as conditional comments which can only be read in certain versions of Internet Explorer. With these comments you might build a stylesheet file named ie7.css that overwrites some primary styles which fix bugs in that specific version of Internet Explorer. It may not be a perfect solution but it does work, and that’s really all that matters.
Final Points
Each of these tips cover a certain aspect of development in CSS. You’ll face many challenges from the time you start a new file all the way to full project completion. As you become more proficient with CSS these problems will be relieved quicker and easier.
To get better at coding you have to practice – but it’s also fun to read how other developers tackle a new project. Go out there and try some of these ideas in your own work just to see how they feel. The best advice I can share on this topic comes from Bruce Lee: “Absorb what is useful, discard what is useless, and add what is specifically your own.”


This is great, I work a lot in other peoples CSS, and it makes me so mad when its an unorganized mess. I will have to share this with me team, of course, I am guilty of doing this too. But taking the extra few minutes may save you hours later.
This is one reason I use LESS. I can split my files as much as I want, and it all gets compiled into one. It’s great for organization.